
概要
コーポレートサイト内に特定のTwitterのタイムラインを表示させます。
Twitterのガイドラインに沿って進めていきます。
全体の手順
Twitterのタイムラインを表示させる手順は下記の通りです
- 埋め込みコードの設定
- コーポレートサイトに埋め込む
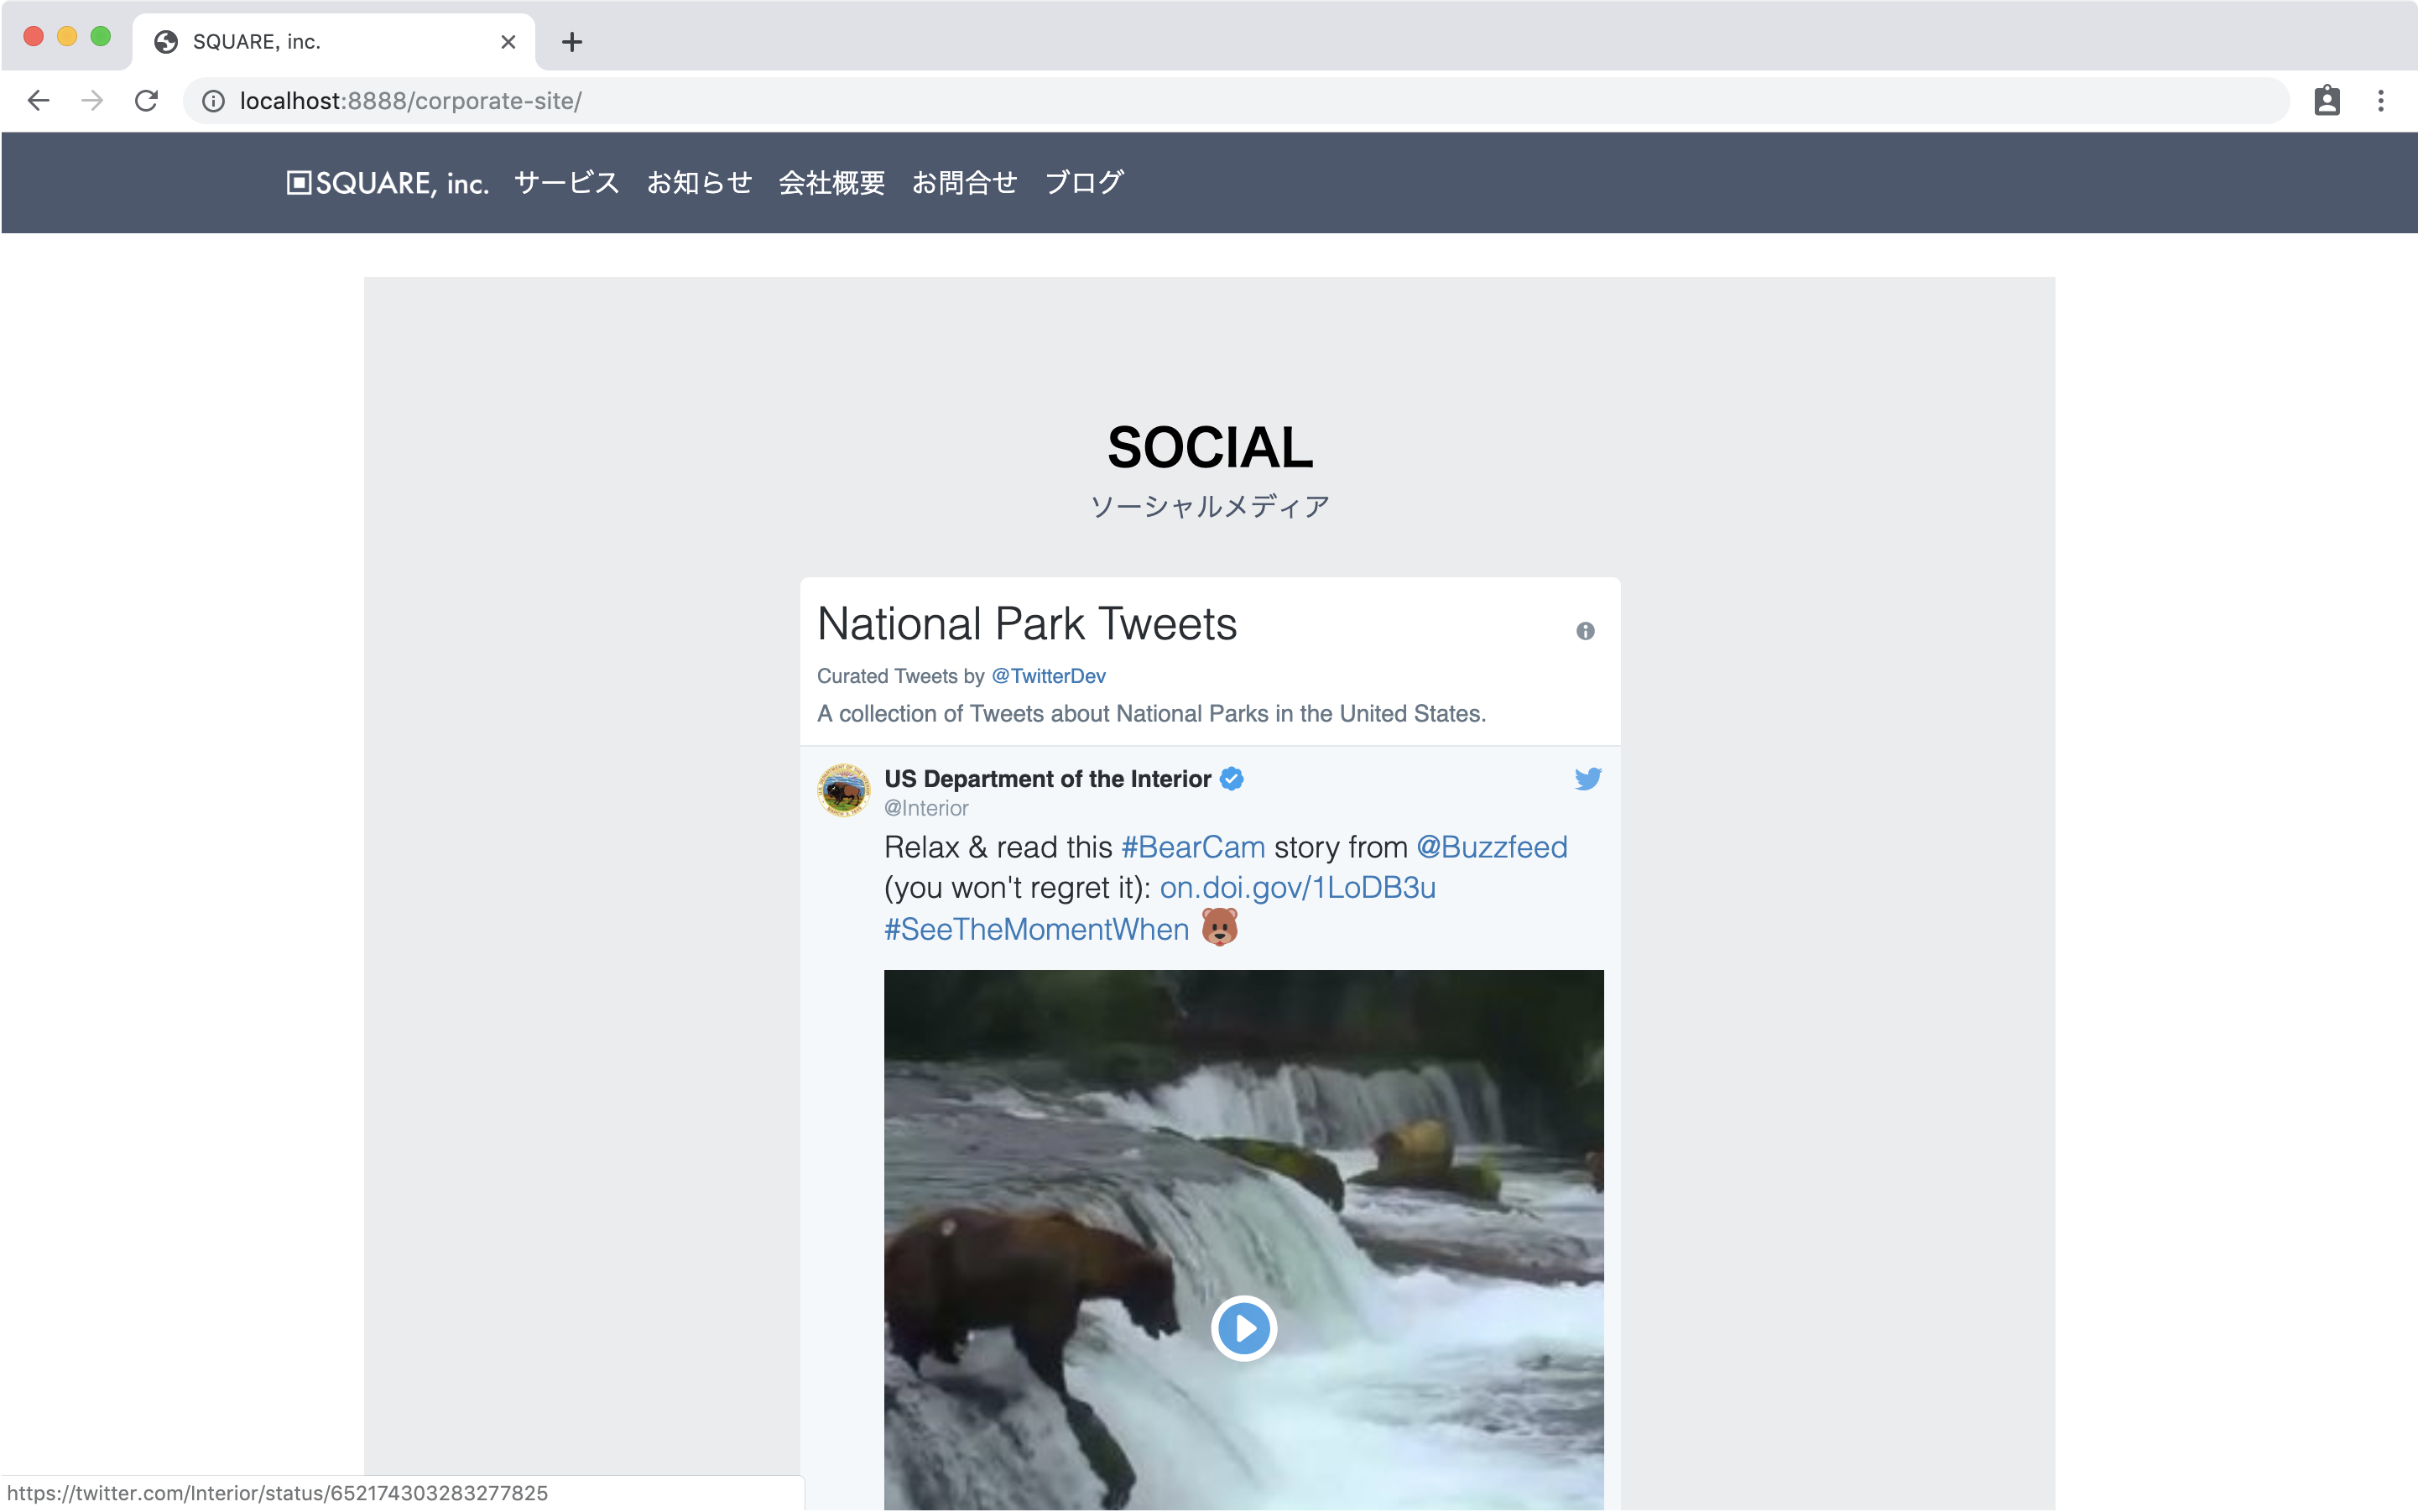
完成イメージ
お問い合わせフォームの下にタイムラインが表示されるようにします。
外部参考サイト
Twitterのガイドライン
https://publish.twitter.com
埋め込みコードの設定
手順はTwitterのガイドラインに則り記述しています。
Twitterの更新により手順が変わることがあります。
本手順は2019年5月28日現在のものです。
https://publish.twitter.comに移動します。
入力窓に、埋め込みたいタイムラインまたはモーメントのリンクを入力します。
入力して進むとコードが表示されるのでコピーします。
イズや文字の色を変更したい場合は「set customization options」をクリックして設定できます。
本コンテンツの場合、set customization optionsでheightを500pxくらいにセットするときれいに表示されますので、設定してみてください。
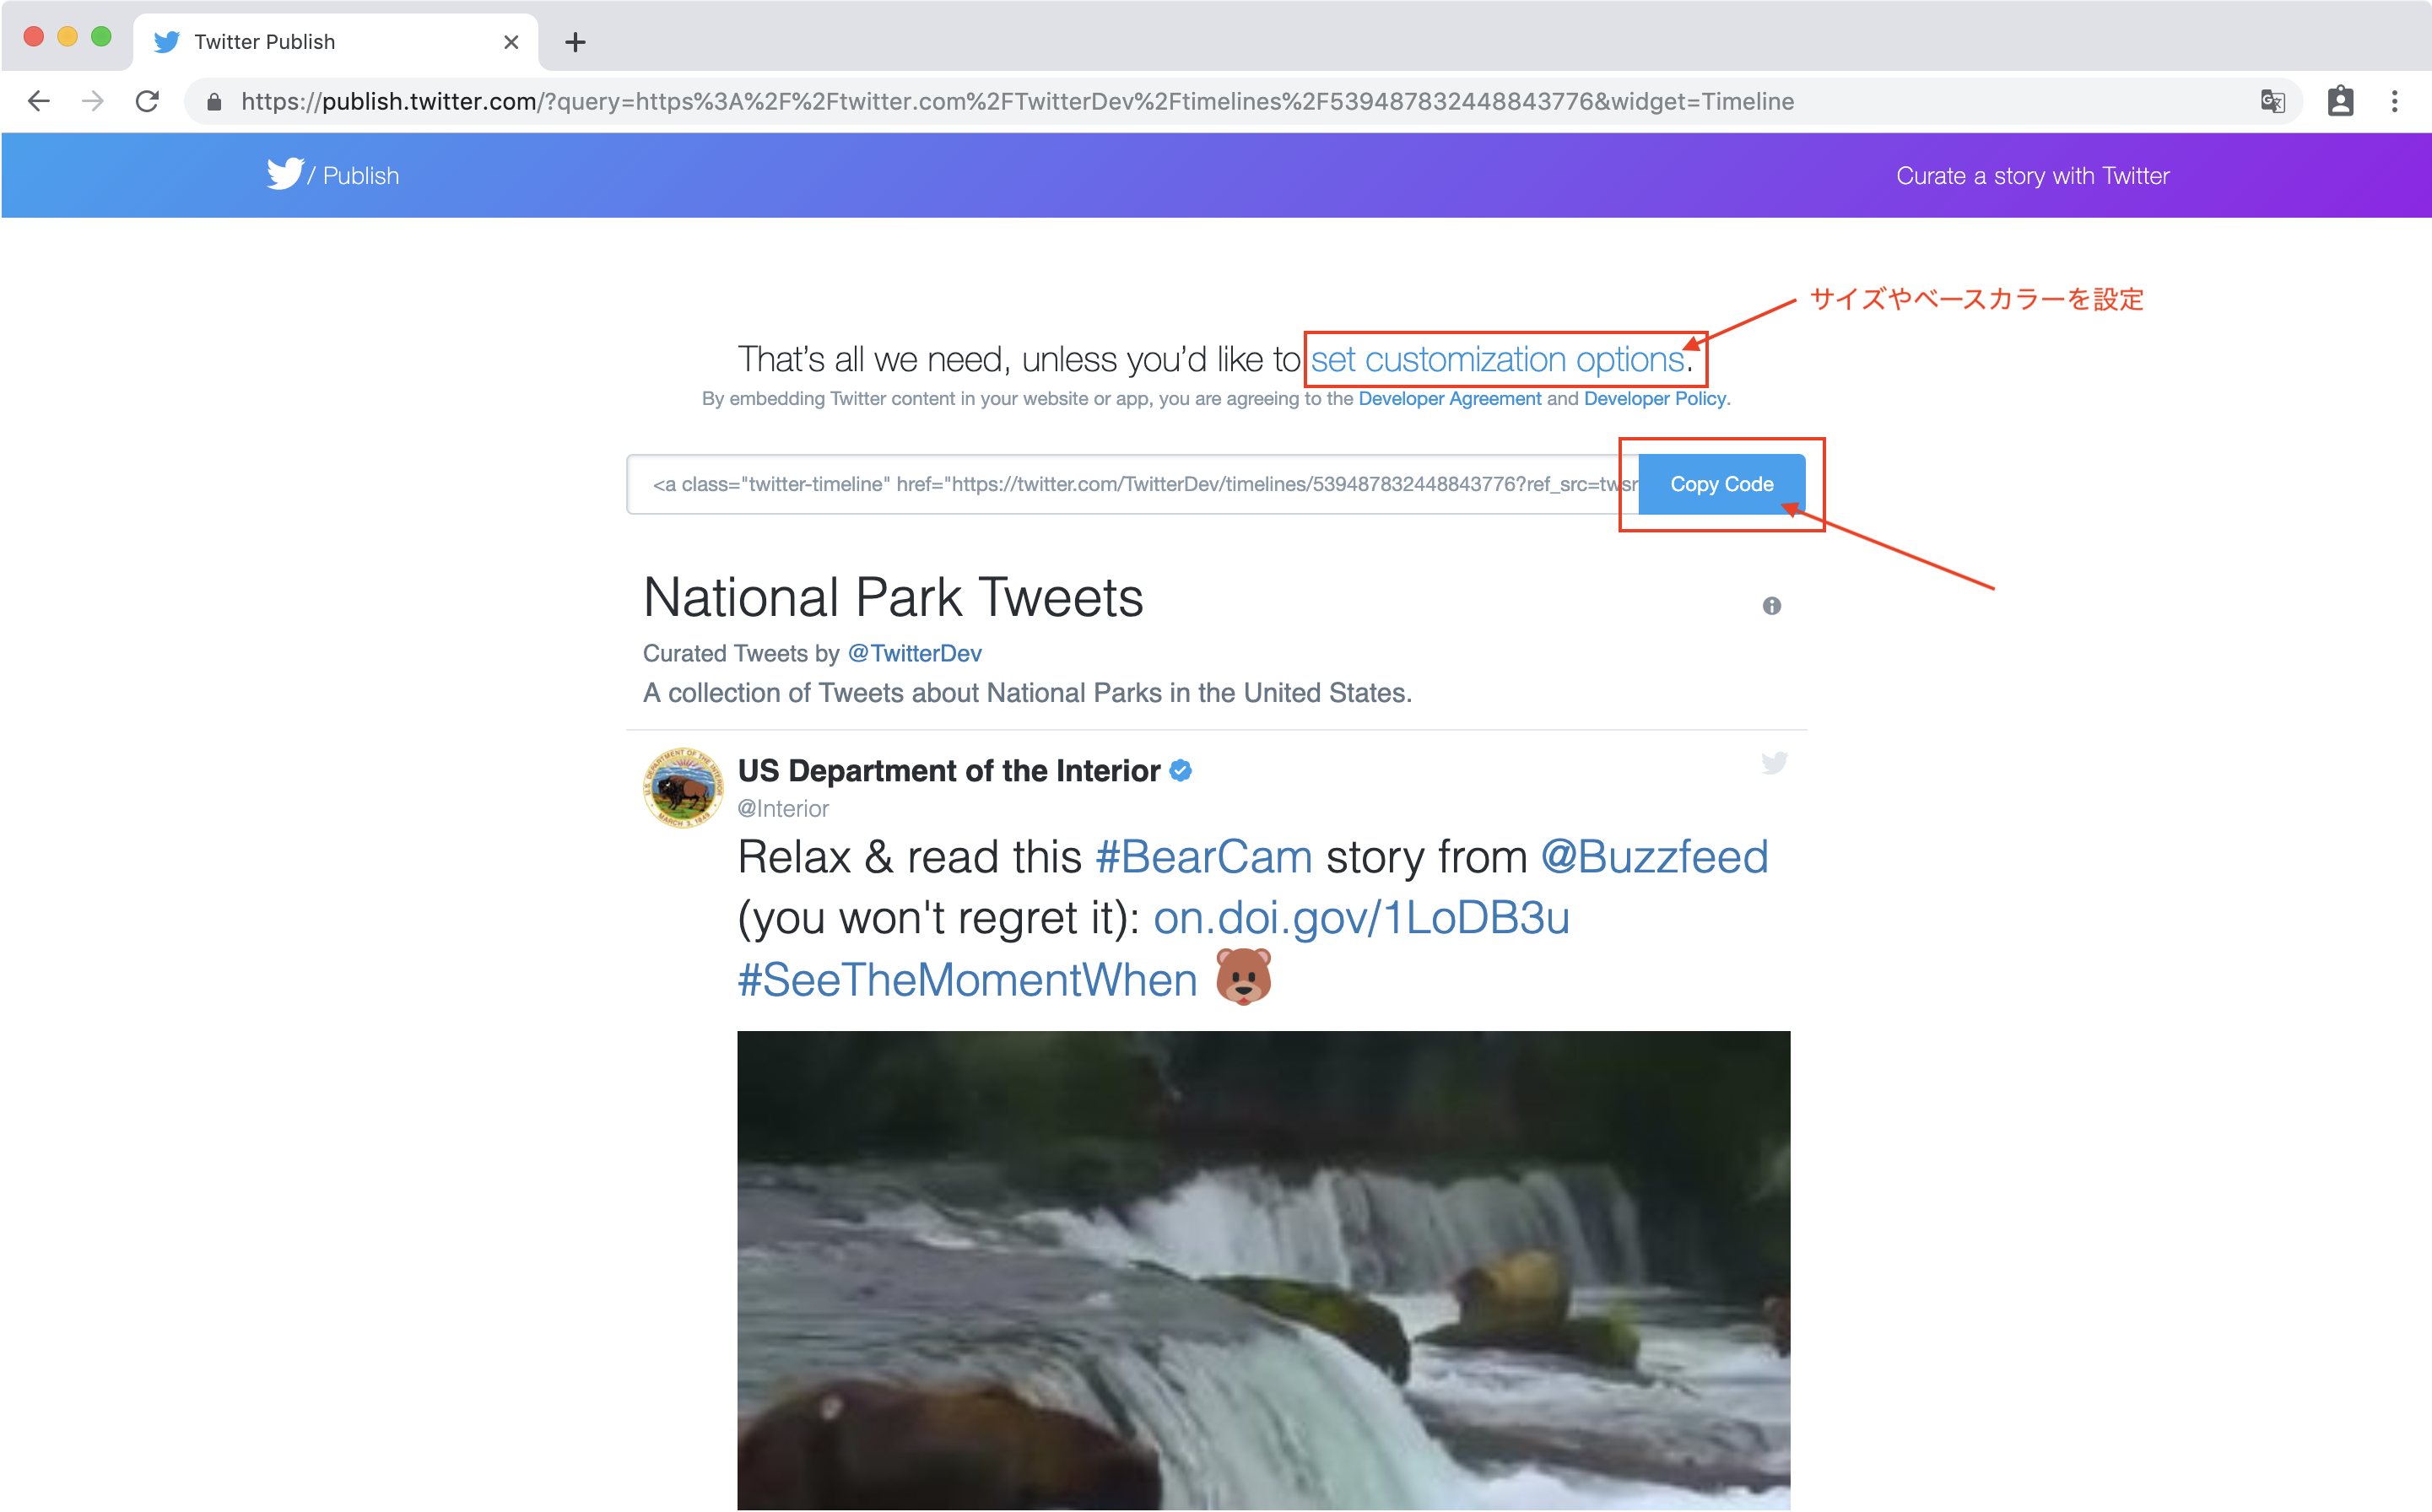
埋め込みコードが更新されるので、更新された埋め込みコードをコピーしておきます。
コーポレートサイトに埋め込む
<main>内の一番下に表示させます。
まず、今、一番下にあるお問い合わせが最後ではなくなるのでlast-wrapperというクラス名を削除します。
次に<!-- end contact -->の下にタイムライン表示スペース追加します。
index.html
        <!-- contact -->
-       <div class="wrapper last-wrapper" id="contact">
+       <div class="wrapper" id="contact">
        <div class="container">
            <div class="wrapper-title">
                <h3>CONTACT</h3>
                <p>お問い合わせ</p>
            </div>
            <form method="POST" action="./conf.php">
                <div class="form-group">
                    <p>お名前 *</p>
                    <input type="text" name="name">
                    <!-- <p class="error">お名前は必須です。</p> -->
                </div>
                <div class="form-group">
                    <p>Email *</p>
                    <input type="email" name="email">
                    <!-- <p class="error">Emailは必須です。</p> -->
                </div>
                <div class="form-group">
                    <p>お問合せ内容 *</p>
                    <textarea name="text"></textarea>
                    <!-- <p class="error">お問い合わせ内容を入力してください。</p> -->
                </div>
                <button type="submit" class="btn btn-submit">内容を確認する</button>
            </form>
        </div>
    </div>
    <!-- end contact -->
+    <!-- SNS -->
+    <div class="wrapper last-wrapper" id="sns">
+        <div class="container">
+            <div class="wrapper-title">
+               <h3>SOCIAL</h3>
+               <p>ソーシャルメディア</p>
+            </div>
+
+            <div class="sns">
+
+            </div>
+        </div>
+     </div>
クラス名がsnsのdivの中に、先程生成した埋め込みコードを貼り付けます。
index.html
        <!-- end contact -->
        <!-- SNS -->
        <div class="wrapper last-wrapper" id="sns">
            <div class="container">
                <div class="wraper-title">
                    <h3>SOCIAL</h3>
                    <p>ソーシャルメディア</p>
                </div>

                <div class="sns">
+               <a class="twitter-timeline" href="https://twitter.com/TwitterDev/timelines/539487832448843776?ref_src=twsrc%5Etfw">National Park Tweets - Curated tweets by TwitterDev</a> <script async src="https://platform.twitter.com/widgets.js" charset="utf-8"></script>
                </div>
            </div>
        </div>
    </main>
あとはCSSを調整します。
styles.css
/* sns */
#sns {
    background-color: #ebeced;
    padding-bottom: 80px;
}
.sns {
    width: 50%;
    margin: 0 auto;
}
responsive.cssはスマホ用に設定している部分に追加します。
responsive.css
/* スマホ用 */
@media screen and (max-width: 660px) {
~~省略~~
+    /* sns */
+    .sns {
+        width: 80%;
+    }
}
ブラウザで確認します。
完成イメージと同様に表示されていたら、サーバにアップロードして反映して完了です。